ATtiny breadboard headers

[Alex] was frustrated by the amount of time it took to start prototyping with an AVR ATtiny. To make things easier, he built headers that carry the 8 and 20 pin chips and plug directly into breadboards. The boards include a 6pin ISP header, resonator, pull-up resistor, reset, and blocking caps. The ATtiny2313 version also has a serial connection header. This is a prototype though, and he forgot to route one of the connections. He plans on having a large batch of boards ready for next month.


Scrabble keyboard

Here’s another bizarre keyboard mod to add to the pile. Unlike previous typewriter style mods, this one uses Scrabble tiles. All of the tiles were hand beveled and attached to a clicky keyboard. The Num, Cap, and Scroll lock buttons have their letters’ hollowed out so the LED light will shine through.
[via Gizmodo]


Using Bittorrent on Amazon EC2

Bittorrent is a great distribution method for large files, but its heavy bandwidth usage can be disruptive to both work and home networks. [Brett O'Connor] has decided to push all of his torrenting activity into the cloud. Amazon’s EC2 service lets you run any number of Amazon Machine Images (AMI, virtual machines) on top of their hardware. You pay for processing time and data transferred. [Brett] put together a guide for building your own seedbox on the service. First, you set up the Security Group, the firewall for the machine. Next, you specify what AMI you want to use. In this example, it’s a community build of Ubuntu. Once you have your SSH keypair, you can start the instance and install Apache, PHP, and MySQL. TorrentFlux is the web frontend for bittorrent in this case. It manages all the torrents and you just need to click download when you want to grab the completed file.
Even if you don’t plan on setting up a seedbox, the post is a straightforward example of how-to get started with EC2. He’s not sure what the cost will be; the current estimate is ~$30/mo.
[via Waxy]
[photo: nrkbeta]


Malware posing as Change.gov

PandaLabs has identified a botnet running a malware campaign impersonating president-elect Obama’s website. The front page of the site features a sensational story titled “Barack Obama has refused to be a president”. Clicking the link will download the malware and make the target’s machine part of the botnet. They’re using fast-flux to assign the malicious domains to the massive number of compromised nodes that are hosting the actual site. The team has contacted the domain name registrar in China to get the domains removed. Using a sensational headline is not new to malware; it’s how the Storm Worm got its name.
[via lithium]


iPod Touch 2G jailbreak demoed

Now that the iphone-dev team has unlocked the iPhone 3G they’re moving onto jailbreaking the iPod Touch 2G. While they have a fully working jailbreak, it’s not yet in a user friendly format. [MuscleNerd] did a live video demo this afternoon to show what progress they had made. It starts with him showing the iPod on but not booting. He’s already patched the kernel, but it’s failing the signature check in iboot. He then uses the team’s recoverytool to exploit a hole in iboot and patch out the signature check. The iPod then boots normally and he shows non-App Store software like Mobile Terminal, Cydia, and an NES Emulator (which makes use of the iPod’s internal speaker).
The redsn0w jailbreak works, but it has to be applied via tether every time the iPod boots. The team won’t release anything until they’ve found a way around this problem. For more insight into the boot process, check out our coverage of their Hacking the iPhone talk at 25C3.


CUIduino, Arduino with true USB support

The CREATE USB Interface (CUI) was a project that came out of UC Santa Barbara around the same time the Arduino was being developed. It has a USB port, a PIC18F4550, and a prototyping area. It was designed to enable easy interfacing with the real would through many A/D inputs and general I/O ports. It supports both OSC and MIDI-over-USB natively. The biggest difference between the CUI and the Arduino is its USB support. The Arduino uses an FTDI chip to create a serial interface to its onboard AVR. The CUI’s PIC has native support for USB. That means you can have the CUI appear to be any USB HID device you want: keyboard, mouse, game controller, etc.
The Arduino has a friendly development environment and a large following though. CUI create [Dan Overholt] decided to add an ATmega168 to his board to get the best of both worlds, the CUIduino (scroll down). It can be programmed just like any other Arduino compatible device, but the having the CUI parent means your Arduino project can behave like a native USB HID gadget.
[Thanks Peter]


RepRap pinch wheel extruder

What you see above is the culmination of [Zach Smith]’s work building a pinch wheel style extruder for the RepRap. The current RepRap 3D printer uses a screw mechanism to push 3mm polymer filament into a heating barrel where it is melted and then extruded through a fine nozzle. [Zach]’s new version uses a drive gear from SDP/SI mounted directly to the DC motor we saw him teardown earlier. He’s redesigned the carrier for the extruder as well. It’s now much lighter and has provisions for mounting current and future controller electronics along with a magnetic rotary encoder. In the last two days, he’s been doing real world testing. It’s been doing well, but he’s learning to do things like always using a full spool and not trying to run short lengths back to back.


Cat5 camera flash extension

Network engineer [Mario Giambanco] recently purchased a cable to move his flash off camera. Unfortunately, it ended up way too short for his purposes. Instead of purchasing a slightly longer proprietary cable, he decided to employ what he had around him: a lot of cat5e cable and ethernet jacks. He cut the cable close to the center in case things didn’t work out and he’d need to repair it. His post on building the custom ethernet flash extension cable goes into heavy detail to make sure you get it right the first time. He’s tested it using both five and 50 foot pieces of cable with no apparent lag.
This isn’t the first time we’ve seen cat5 repurposed: composite video through cat5, vga cat5 extension, and cat5 speaker cables.
[via Lifehacker]


Generating MIDI with Ruby
[Giles Bowkett] has been working on a music library for Ruby called Archaeopteryx. He describes it as a “Ruby MIDI DJing/live-coding thing“. In the video above, He’s using it to generate and then morph rhythms. The Ruby code is directly controlling the step sequencer in Reason. It’s an interesting approach to music development. The video above gives a full intro to the probability approach to generation. To really get a feel for the library, we suggest you watch his presentation from RubyFringe. It shows him playing music by editing a live block of code. Check out his Vimeo feed for many more demo videos.
[via CDM]


Dismantling the Storm Worm botnet

Zero Day has an interview with German researchers who have found a way to take down the Storm Worm botnet. Their program, Stormfucker, takes advantage of flaws in Storm’s command network: Nodes that are NAT‘d only use a four-byte XOR challenge. Nodes that aren’t NAT’d are only using a trivial 64bit RSA signature. Their solution can clean infected machines and also distribute to other nodes. Unfortunately, installing software without the user’s consent is the exact same behavior as malware. Don’t expect to see this in any sort of widespread use. The researchers did point out that some ISPs have moved to shutting off service for infected customers until their machines are cleaned.


PID SMD reflow hot plate

[mightyohm] put together a nice piece of lab kit. It’s a PID controlled hot plate. The plate is capable of reaching 500F, hot enough to do SMD reflow soldering. The large chunk of metal has a hole drilled through the center to contain a cartridge heater. A thermocouple is used to monitor the temperature of the plate. Ceramic standoffs separate the plate from the rest of the device, but he still needs to come up with a way to stop the radiant heating. The control box houses the surplus PID controller along with the power switch and solid state relay (SSR).


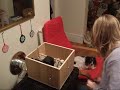
Electric spinning wheel

[glacialwanderer], who you may remember from his CNC machine build, recently completed an electric spinning wheel. Spinning wheels are used by knitters to turn raw sheep’s wool into yarn. He went through several iterations before arriving at a good design. Besides the motor, there are two major components to the spinning wheel: the flyer and the bobbin. A Scotch tension brake is used to slow the rotation of the bobbin in relation to the flyer. This causes the wool to twist as it’s pulled on.
He initially tried to just use a dimmer switch with an AC motor. That quickly burnt up. The next version used a sewing machine motor since they’re designed with a variable speed control. Unfortunately, it didn’t have enough torque at low speeds. The final design used a DC motor with a SyRen motor controller. It offered plenty of power and at ~$150 it’s still less than the cheapest commercial models on eBay. You can see a video of it and the spinning process embedded below.


M-CLE: Hacked smart cycle

M-CLE, described as ” a physical learning environment in which synergistic artificial intelligence through the use of robots(creative agents) is employed to embellish the creativity of the child”, looks like a pretty fun toy. For those of you who haven’t figured out what it does from that quote, it is a toy that kids ride on to control a robot. That robot draws on the floor while other robots interact with it using AI. This is all made to “embellish” the child’s creative work.
To control the robot, a child rides on a Fischer Price Smart Cycle. The factory electronics were replaced with an ATMEGA168. A wireless transmitter connects to the robot, which is also powered by an ATMEGA168. While one robot is controlled by the child, the others are packed with sensors to allow them to interact with it. They use touch, ultrasonic ping detectors, and IR line detectors. You can see it all in action in the video summary.
The design is interesting, everything is bright and colorful, and the shark fins on the robots are a nice touch. We have to wonder though, with a toy to ride on, a robot to control, and 3 other robots to watch in wonder, is the child going to be too distracted to be very creative?


Debian on the G1 once again

[ghostwalker] dropped in on our previous Debian Android post to let us know that he had streamlined the install process. The first time around, it quickly became difficult to complete the process because firmware updates had taken away root access. Hackers have since figured out how to downgrade from RC30 and install BusyBox. All you need to do to put Debian on your phone is download the package from [ghostwalker] and then run the installer script. This isn’t technically a port since Debian already has ARM EABI support. What would you run on your phone if you had access to the entire Debian package tree? A video of Debian starting up is embedded below.

[photo: tnkgrl]


How-to: Prepare your Eagle designs for manufacture

Cadsoft Eagle is a multi-platform freeware circuit layout program. Lots of open source hardware is designed in Eagle, and it’s become a hobbyist favorite. We use it for all of our hardware designs.
There are several ways to turn an Eagle design into an actual printed circuit board (PCB). We’ll show you how to save Eagle designs as industry-standard gerber files that are accepted by any PCB manufacturer. You can use the gerbers to order a single prototype, or a full panel.
Introduction
Toner transfer is the beginners’ favorite way to make a PCB because the investment in materials is minimal. We’ve covered toner transfer before. Most PCBs in our how-tos are made with the photo-resist process. The photo process makes nice boards, but requires a bit of equipment; sensitized boards, developer, and an ultra-violet light source.
Some board manufacturers, like Olimex, make PCBs directly from Eagle .brd files. Most require a minimum order of one eurocard-sized PCB (100mmx160mm). Good if you need a few boards, expensive for a single experimental prototype.
The cheapest option is to submit gerber files like the professionals. Any PCB manufacturer will accept gerber formatted design files. Gold Pheonix sells 155square inches of PCB panel for $110. If you’re looking for something smaller, services like BatchPCB and PCB-Pool combine small orders and submit them as a full panel. Either way, you’ll submit gerber files to the board house. This is the process we describe.
Process overview
- Prepare the design.
- Create gerbers, generic files accepted by any PCB fab house.
- Verify that the gerbers are correct.
- Send the design for production.
Prepare the design
We’re going to walk you through the process of preparing our digital picture frame PCB for production. This design requires a double-sided board with fairly small traces.

Download the project archive (ZIP) from last week. Open the .brd file with the freeware version of Cadsoft Eagle.

The ground fill is empty when the file opens. Press the ratsnest button (or Tools->Ratsnest) to fill in the empty polygons.

Board manufacturers publish specifications outlining their production capabilities, such as the smallest possible traces, spacing, and drill size. BatchPCB has 8mil minimum traces and spacing, and 20mil minimum holes.

Don’t torture the manufacturer. Just because they advertise 8mils, doesn’t mean it’s safe to make every trace 8mils. Slightly larger-than-minimum tolerances will reduce manufacturing errors. The digital picture frame has 8mil traces around the tiny LCD connector, shown above. The traces are 8mils only until there’s enough clearance to use 10mil traces.

Use Eagle’s design rule check to make sure your board doesn’t exceed the manufacturer’s production abilities. Download the SparkFun design rules (DRU) for BatchPCB, or the Olimex 8mil (DRU) or 10mil (DRU) design rules. Click the DRC icon (or, Tools->DRC) and load the design rule file. Eagle analyzes the design and highlights any areas that violate the design rule parameters.
Correct any errors. Here, the spacing between traces is too close. Sometimes the spacing on a part footprint is too small to be manufactured. Sparkfun’s default footprint for the Nokia LCD connector had pad spacing less than 8mils. We edited the part library to make the pads smaller, and the separation larger.

It’s helpful to include part numbers on the printed silkscreen layer. BatchPCB prints a silkscreen on both sides. Be sure to see what your board house offers, some charge extra. Use the smash tool to unlink obscured labels, then move them to a better location.
Create gerber files
Gerber files are the PDFs of PCBs. Gerber files describe a PCB exactly as it should appear, agnostic of the display hardware. It’s a final production format that isn’t intended to be edited. We created our gerber files in Eagle using the procedure outlined in SparkFun’s Eagle tutorial.

The Eagle CAM processor writes gerber files, open it from the menu under File->CAM processor.
SparkFun has a script (CAM) that configures the CAM processor to make gerber files. Load the CAM script using File->Open->Job…

By default, SparkFun’s silkscreen configuration only includes the place layer. Our parts usually have labels on the names and docu layers, activate these layers on the top and bottom silkscreen tabs to add them to the output.
Click Process Job to create the gerber files.

The CAM processor creates seven files that we need.
- Top and bottom copper (.GTL, .GBL)
- Top and bottom solder mask (.GTS, .GBS)
- Top and bottom silkscreen (.GTO, .GBO)
- Drill file, 2.4 leading (.TXT)
Verify that the gerbers are correct
Verify the CAM output in a gerber viewer to make sure everything was positioned correctly. We followed SparkFun’s suggestion and used Viewplot.

Load the seven files with Viewplot. Be sure to specify the drill file type as 2.4 leading.

Check for errant vias, mirrored layers, and alignment. We’ve noticed that text added to the silkscreen layer is usually bigger than it was in Eagle. Correct any problems and run the CAM processor again.
When everything looks good, the board is ready for production.
Send the design for production
Zip the seven gerber files and submit them to the PCB fab house. Remember to tell them that the drill file format is 2.4 leading.
BatchPCB is a pooled panel service that sells space by the square inch. Other manufacturers and batch services require you to order at least a full eurocard. We use BatchPCB for prototyping because we never need the extra board space of a full eurocard, and we don’t mind the average 20day wait.
At BatchPCB, $2.50/square inch buys a PCB with silkscreen on both sides, unlimited vias, and a huge range of drill sizes; stuff that usually costs extra. BatchPCB’s minimum traces, spacing, and drill are similar to other prototyping services. There’s a $10 per order setup fee, but an order can include multiple designs. Shipping, even internationally, isn’t outrageous.
If you need a lot of the same board, look at Gold Phoenix. They manufacture boards for BatchPCB. A 100 square inch panel is $100, a 155 square inch panel is $110.

Create an account at BatchPCB. Click upload to add a new design. Name the design and upload the zip archive containing the 7 gerber files.

Verify that the gerber layers were successfully detected.

Verify that the correct size was detected.

The BatchPCB rule check ‘robot’ will verify that your design meets production standards, and send an e-mail in a few minutes. Since we ran our own rule check prior to sending the design, we can expect that everything will be fine. Click continue and you’ll have the option to order the board. For more help, see the BatchPCB help and support forum.
Receive your boards

Boards arrive from BatchPCB in about 20 days. Check the boards for obvious errors before soldering. Some manufacturers test PCBs, BatchPCB doesn’t. We’ve ordered PCBs from two of the popular hobbyist board houses, Olimex and BatchPCB, and all the boards have been satisfactory.
Taking it further
It’s easy to order professional PCBs using gerber files. Why not build that awesome DIY project you’ve been putting off?
What has been your experience with PCB fab houses?


You received this email because you are subscribed to the real_time feed for http://hackaday.com/feed/. To change your subscription settings, please log into RSSFWD.
No comments:
Post a Comment